Pattern Editor: Difference between revisions
No edit summary |
mNo edit summary |
||
| (2 intermediate revisions by the same user not shown) | |||
| Line 3: | Line 3: | ||
[[Image:3.2_tab-edit.png]] | [[Image:3.2_tab-edit.png]] | ||
The Pattern Editor is the main editor used to create music in Renoise and is opened with the Edit tab at the top left of the interface. Instruments are recorded by entering notes onto lines in the order that they are to be played, from top to bottom. This is done with the [[Tracker Interface]], so if you're unfamiliar with this method of working, you should [[Tracker Interface|read through that section]] of the manual before continuing here. | The Pattern Editor is the main editor used to create music in Renoise and is opened with the Edit tab at the top-left of the interface. Instruments are recorded by entering notes onto lines in the order that they are to be played, from top to bottom. This is done with the [[Tracker Interface]], so if you're unfamiliar with this method of working, you should [[Tracker Interface|read through that section]] of the manual before continuing here. | ||
A pattern can contain multiple tracks, typically one for each different instrument and each with their own separate set of effects. Songs are created by arranging a sequence of patterns with the [[Pattern Sequencer]] and the [[Pattern Matrix]]. So, a pattern is normally used to represent a specific section of a song that may be repeated again in future. The length and speed of a pattern can be changed, so the exact nature of a specific pattern can vary wildly depending on the whims of the composer. | A pattern can contain multiple tracks, typically one for each different instrument and each with their own separate set of effects. Songs are created by arranging a sequence of patterns with the [[Pattern Sequencer]] and the [[Pattern Matrix]]. So, a pattern is normally used to represent a specific section of a song that may be repeated again in future. The length and speed of a pattern can be changed, so the exact nature of a specific pattern can vary wildly depending on the whims of the composer. | ||
You may find it useful to watch [https://youtu.be/ | You may find it useful to watch [https://youtu.be/OcFYaXkgv2w our video on the topic of Track Types and Organisation]. | ||
[[Image:3.5_patterneditor.png]] | [[Image:3.5_patterneditor.png]] | ||
| Line 26: | Line 26: | ||
[[Image:3.5_patterneditor-group.png]] | [[Image:3.5_patterneditor-group.png]] | ||
Group tracks collect together similar tracks, such as all percussion, all synths etc. The child tracks have their output automatically routed through the parent track, though you can change this with the [[Effect Chains#Pre_and_Post_Mixer_Effects|Pre Mixer]]. This means that [[Effect Chains|Track Effects]], [[Graphical Automation|Automation]] and [[Effect Commands]] used in the Group Track will affect the audio coming from the standard Tracks contained within it. Notes cannot be entered into Group Tracks and so they only feature [[Tracker Interface#Columns|Master FX]] columns. | |||
=== Send Tracks === | === Send Tracks === | ||
| Line 32: | Line 32: | ||
[[Image:3.2_patterneditor-send.png]] | [[Image:3.2_patterneditor-send.png]] | ||
Send Tracks are fed audio from other tracks using [[Routing_Devices#.23Send_Device|Send Devices]] and are typically used to apply the same set of [[Effect Chains|Track Effects]] to multiple tracks at once | Send Tracks are fed audio from other tracks using [[Routing_Devices#.23Send_Device|Send Devices]] and are typically used to apply the same set of [[Effect Chains|Track Effects]] to multiple tracks at once. You can even route audio from one Send Track to another. This is topic has a lot of possibilities, so check out the [https://youtu.be/jChkwB8b7to ‘Send Tracks & Devices’ video] for a full breakdown. Notes cannot be entered into Send Tracks and so they only feature [[Tracker Interface#Columns|Master FX]] columns. | ||
=== Master Track === | === Master Track === | ||
| Line 40: | Line 38: | ||
[[Image:3.2_patterneditor-master.png]] | [[Image:3.2_patterneditor-master.png]] | ||
The Master Track is where all audio produced by the other tracks finally ends up | The Master Track is where all audio produced by the other tracks finally ends up. Effects placed on the Master Track will therefore affect the output of the entire song. To help manage the master signal, the [[Effect_Chains#Pre_and_Post_Mixer_Effects|Post-Mixer device]] in the Master Track has a few more controls than the other tracks. Notes cannot be entered into the Master Track and so it only features [[Tracker Interface#Columns|Master FX]] columns. | ||
| Line 55: | Line 53: | ||
=== Organising Tracks === | === Organising Tracks === | ||
There’s a number of options available for organisation. A track can be renamed by double-clicking on its name and typing in a new one. This is also true for [[Tracker Interface#Columns|Note Columns]]. | |||
Tracks can be repositioned by left-clicking and holding the button on its name, then dragging the track to either side. This can be done in both the Pattern Editor and the [[Mixer]]. You can also move tracks by using the ''Ctrl/Cmd + Alt + Left/Right'' shortcuts. | |||
<!-- RENOISE_NO_PDF_START --> | <!-- RENOISE_NO_PDF_START --> | ||
| Line 67: | Line 61: | ||
<!-- RENOISE_NO_PDF_STOP --> | <!-- RENOISE_NO_PDF_STOP --> | ||
To | To add or remove tracks you can use the menu in the [[Introduction_To_Renoise#Upper_Status_Bar|Upper Status Bar]] to select the ''"Edit->Insert Track" (Ctrl/Cmd + T)'' and ''"Edit->Delete Track" (Ctrl/Cmd + Shift + T)'' commands, or use the right mouse button menu. If the currently selected track is a Standard Track, then a new track will be added to the right of it. If the currently selected track is a Send Track or the Master Track, then another Send Track will be added. | ||
Exact copies of tracks can be created with the ''"Edit->Duplicate Track" (Ctrl/Cmd + D)'' command, which will duplicate the columns and the [[Effect Chains|Effect Devices]], but not the notes, [[Effect Commands]] and [[Graphical Automation]]. To do those as well, choose the “incl. Patterns” option ''(Ctrl/Cmd + Alt + D)''. | |||
To add a Group track use the ''"Edit->Insert Group" (Ctrl/Cmd + G)'' command. Alternatively, dragging one track onto another while holding down ''Alt'', will create a new Group and add both tracks to it. To add a track to an existing Group, just drag it to the desired position. A Group can be created for multiple tracks at once by selecting those tracks, then using ''"Edit->Insert Group from Selection" (Ctrl/Cmd + Alt + G)''. Don’t forget that Groups can be nested within Groups. | |||
=== Collapsing Tracks === | === Collapsing Tracks === | ||
| Line 73: | Line 71: | ||
To collapse a track, press the small arrow to the left of the track's name. This just hides most of its information; the track will still play as normal. You can collapse a Group of tracks in the same way and also collapse ''the Group's'' [[Tracker Interface#Columns|Master FX]] column using the arrow to the right of its name. | To collapse a track, press the small arrow to the left of the track's name. This just hides most of its information; the track will still play as normal. You can collapse a Group of tracks in the same way and also collapse ''the Group's'' [[Tracker Interface#Columns|Master FX]] column using the arrow to the right of its name. | ||
Enabling [[#Pattern Editor Control Panel|Single Track Edit Mode]] will cause all of the tracks and groups to collapse, except for the track that the cursor is currently in. Moving the cursor to other tracks while in this mode will automatically expand those tracks and collapse the one you were previously in. | |||
<!-- RENOISE_NO_PDF_START --> | <!-- RENOISE_NO_PDF_START --> | ||
| Line 81: | Line 79: | ||
=== Changing Track Colors === | === Changing Track Colors === | ||
To change the color of a track, left-click on the color slot above the track name. Using the color picker you can move around the grid to choose a color, while the left-hand slider controls the saturation value. You can also pick colors from the available swatches or right click on a swatch to save the current color to it. The ''"Background Blend"'' slider controls the amount of color present in the track's background. Enabling ''"Apply to all tracks"'' will apply the slider value to all of the tracks at once. | To change the color of a track, left-click on the color slot above the track name. Using the color picker you can move around the grid to choose a color, while the left-hand slider controls the saturation value. You can also pick colors from the available swatches or right-click on a swatch to save the current color to it. The ''"Background Blend"'' slider controls the amount of color present in the track's background. Enabling ''"Apply to all tracks"'' will apply the slider value to all of the tracks at once. | ||
[[image:3.2_patterneditor-colours.png]] | [[image:3.2_patterneditor-colours.png]] | ||
Latest revision as of 21:41, 1 December 2025
Pattern Editor
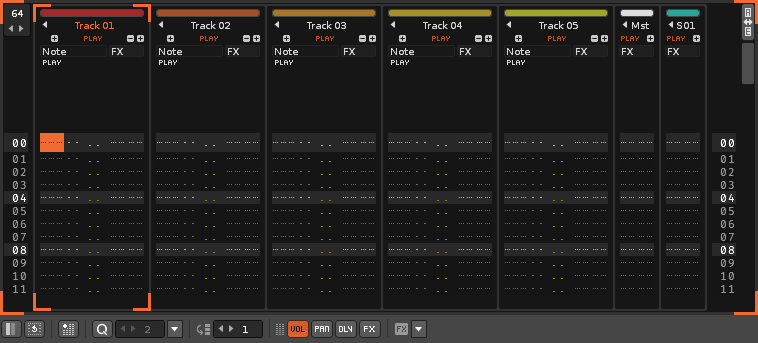
The Pattern Editor is the main editor used to create music in Renoise and is opened with the Edit tab at the top-left of the interface. Instruments are recorded by entering notes onto lines in the order that they are to be played, from top to bottom. This is done with the Tracker Interface, so if you're unfamiliar with this method of working, you should read through that section of the manual before continuing here.
A pattern can contain multiple tracks, typically one for each different instrument and each with their own separate set of effects. Songs are created by arranging a sequence of patterns with the Pattern Sequencer and the Pattern Matrix. So, a pattern is normally used to represent a specific section of a song that may be repeated again in future. The length and speed of a pattern can be changed, so the exact nature of a specific pattern can vary wildly depending on the whims of the composer.
You may find it useful to watch our video on the topic of Track Types and Organisation.
Track Types
There are four different types of track in the Renoise Pattern Editor:
Tracks
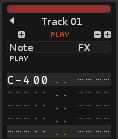
These standard tracks are where you record notes onto the lines of a Note Column. Each track also features Effect Columns, which are used to apply Effect Commands to instruments and to control Track Effects.
Group Tracks
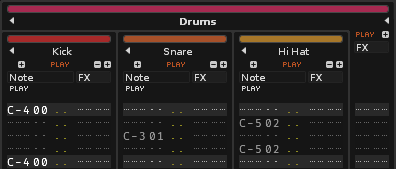
Group tracks collect together similar tracks, such as all percussion, all synths etc. The child tracks have their output automatically routed through the parent track, though you can change this with the Pre Mixer. This means that Track Effects, Automation and Effect Commands used in the Group Track will affect the audio coming from the standard Tracks contained within it. Notes cannot be entered into Group Tracks and so they only feature Master FX columns.
Send Tracks
Send Tracks are fed audio from other tracks using Send Devices and are typically used to apply the same set of Track Effects to multiple tracks at once. You can even route audio from one Send Track to another. This is topic has a lot of possibilities, so check out the ‘Send Tracks & Devices’ video for a full breakdown. Notes cannot be entered into Send Tracks and so they only feature Master FX columns.
Master Track
The Master Track is where all audio produced by the other tracks finally ends up. Effects placed on the Master Track will therefore affect the output of the entire song. To help manage the master signal, the Post-Mixer device in the Master Track has a few more controls than the other tracks. Notes cannot be entered into the Master Track and so it only features Master FX columns.
Track Options
Muting Tracks
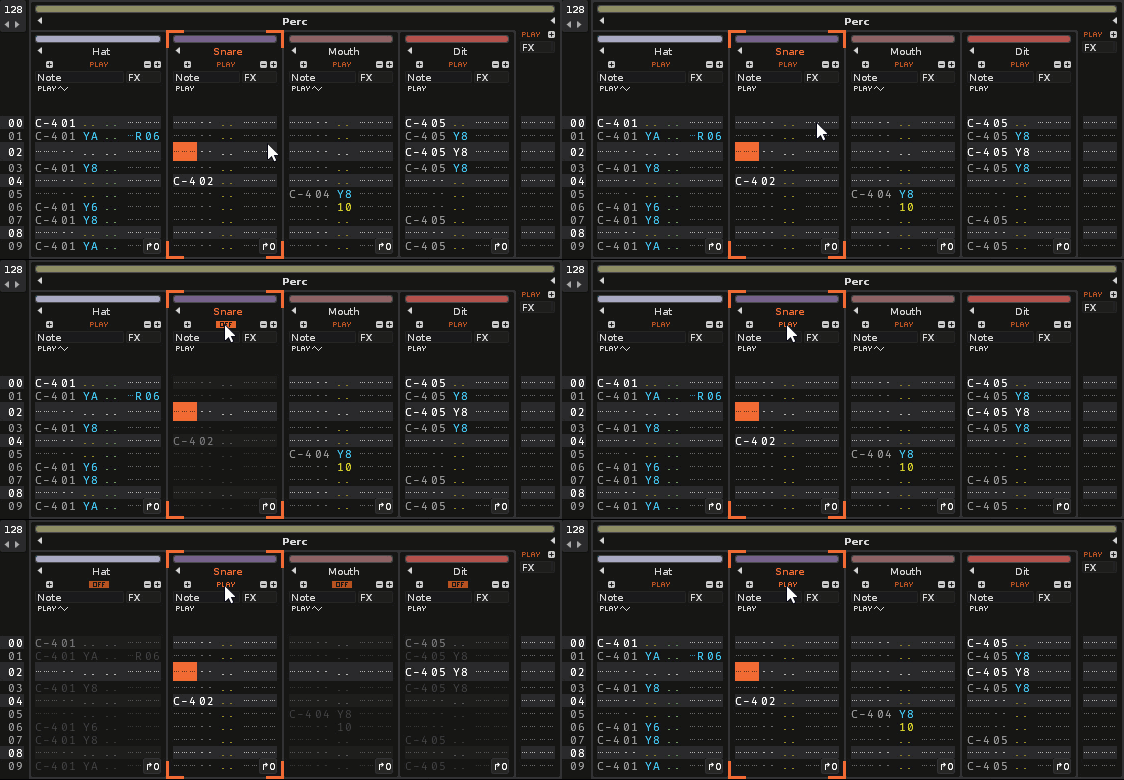
An individual track can be muted by left-clicking on the 'Play' text underneath its name. Clicking again will un-mute it. Right-clicking a track's 'Play' text will solo it, muting all of the others so that only the audio from that track is heard. Right-clicking again will un-mute the other tracks. Similar operations can be performed on the Track Scopes.
Organising Tracks
There’s a number of options available for organisation. A track can be renamed by double-clicking on its name and typing in a new one. This is also true for Note Columns.
Tracks can be repositioned by left-clicking and holding the button on its name, then dragging the track to either side. This can be done in both the Pattern Editor and the Mixer. You can also move tracks by using the Ctrl/Cmd + Alt + Left/Right shortcuts.
To add or remove tracks you can use the menu in the Upper Status Bar to select the "Edit->Insert Track" (Ctrl/Cmd + T) and "Edit->Delete Track" (Ctrl/Cmd + Shift + T) commands, or use the right mouse button menu. If the currently selected track is a Standard Track, then a new track will be added to the right of it. If the currently selected track is a Send Track or the Master Track, then another Send Track will be added.
Exact copies of tracks can be created with the "Edit->Duplicate Track" (Ctrl/Cmd + D) command, which will duplicate the columns and the Effect Devices, but not the notes, Effect Commands and Graphical Automation. To do those as well, choose the “incl. Patterns” option (Ctrl/Cmd + Alt + D).
To add a Group track use the "Edit->Insert Group" (Ctrl/Cmd + G) command. Alternatively, dragging one track onto another while holding down Alt, will create a new Group and add both tracks to it. To add a track to an existing Group, just drag it to the desired position. A Group can be created for multiple tracks at once by selecting those tracks, then using "Edit->Insert Group from Selection" (Ctrl/Cmd + Alt + G). Don’t forget that Groups can be nested within Groups.
Collapsing Tracks
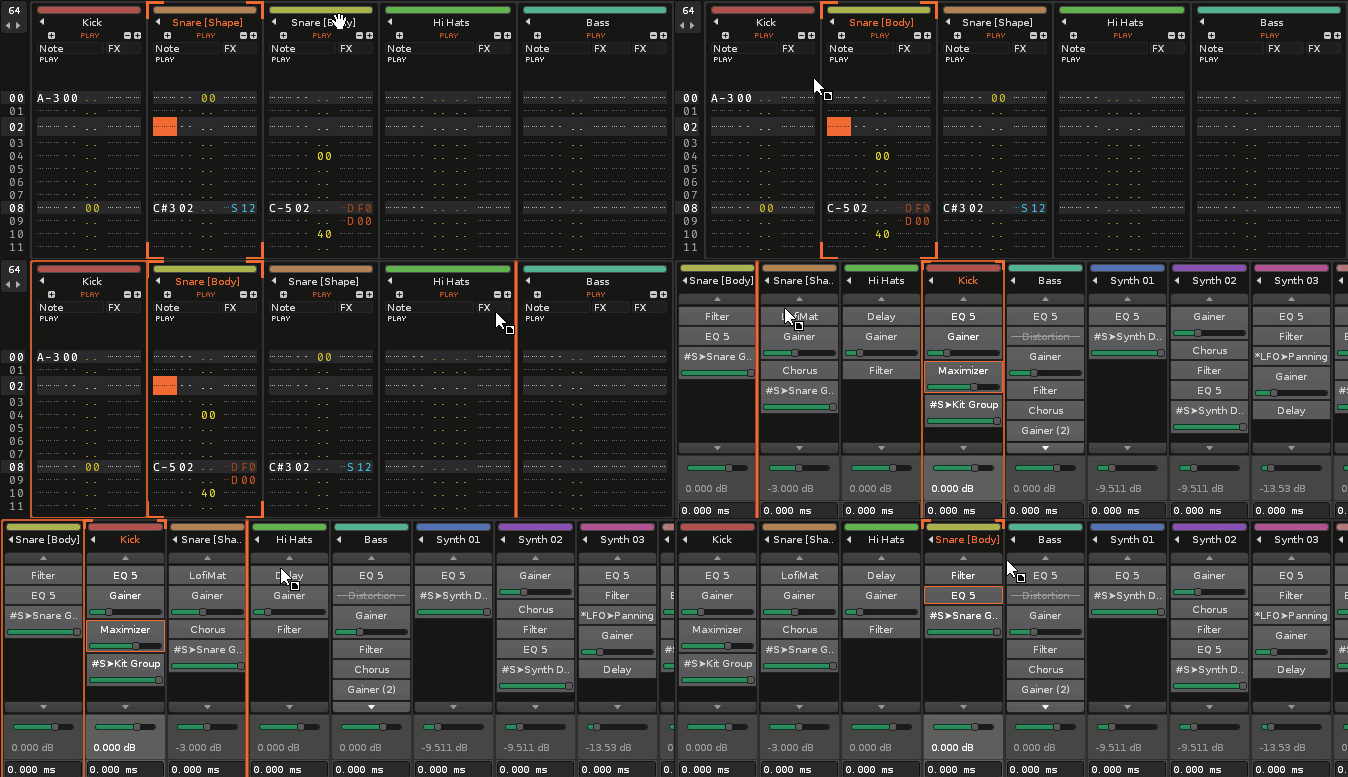
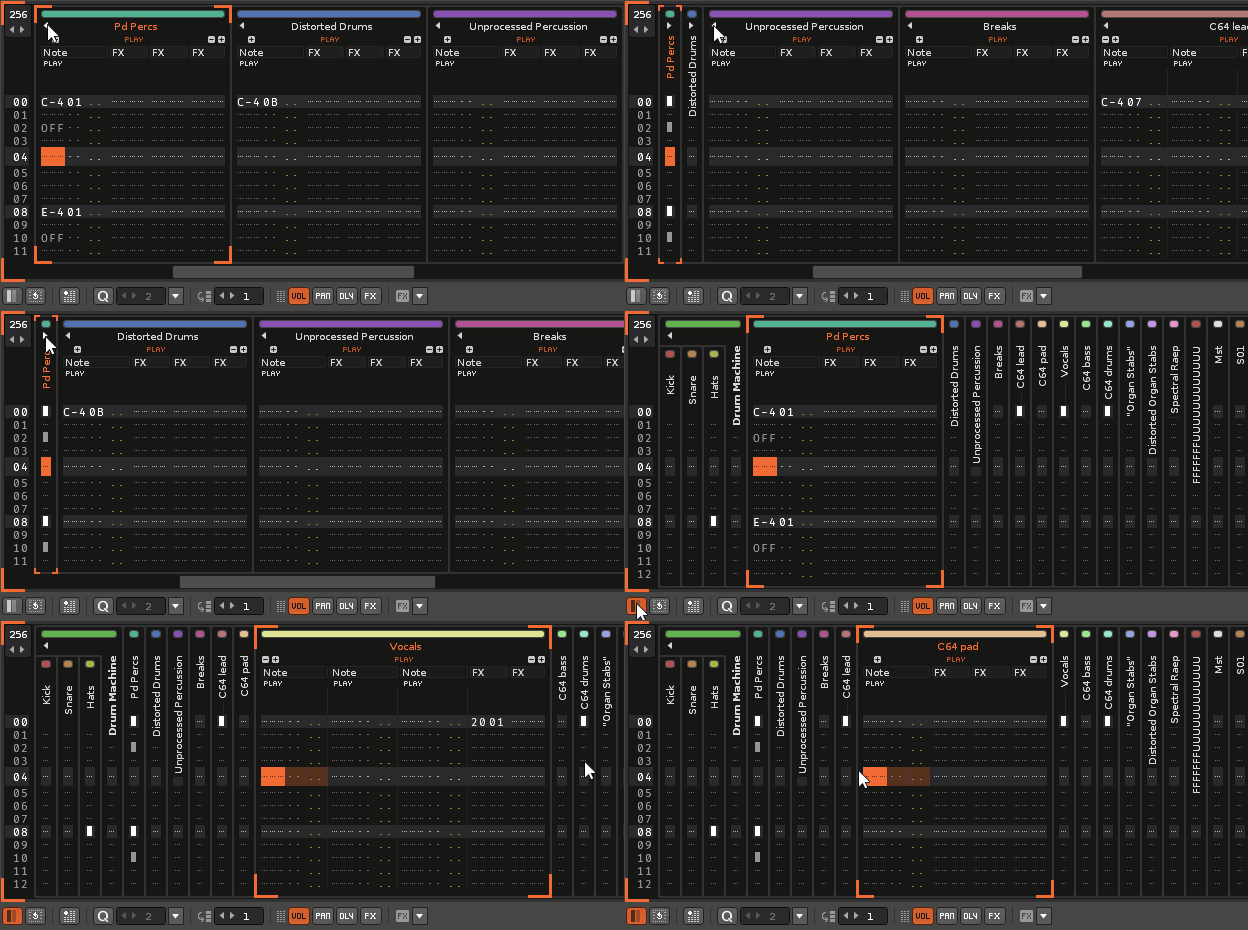
To collapse a track, press the small arrow to the left of the track's name. This just hides most of its information; the track will still play as normal. You can collapse a Group of tracks in the same way and also collapse the Group's Master FX column using the arrow to the right of its name.
Enabling Single Track Edit Mode will cause all of the tracks and groups to collapse, except for the track that the cursor is currently in. Moving the cursor to other tracks while in this mode will automatically expand those tracks and collapse the one you were previously in.
Changing Track Colors
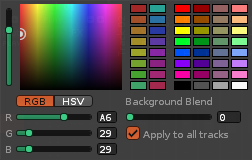
To change the color of a track, left-click on the color slot above the track name. Using the color picker you can move around the grid to choose a color, while the left-hand slider controls the saturation value. You can also pick colors from the available swatches or right-click on a swatch to save the current color to it. The "Background Blend" slider controls the amount of color present in the track's background. Enabling "Apply to all tracks" will apply the slider value to all of the tracks at once.
Pattern Editor Control Panel
At the bottom of the Pattern Editor is the control panel:
- Single Track Edit Mode: When enabled, all tracks will be collapsed except for the currently selected track.
- Pattern Wrap Mode: Toggle what will happen upon reaching the end of a pattern when entering notes step-by-step in Edit Mode. When enabled, the cursor will move to the top of the next pattern in the sequence. When disabled, the cursor will move back to the top of the current pattern.
- Pattern Automation Recording Mode: When enabled, right-clicked and MIDI mapped parameters are recorded into Automation instead of the track's Master FX Column.
- Quantize Controls: Toggle live quantization. The value box to the right specifies the quantization value in lines. Use the drop-down menu next to the value box to manually quantize a selected area of the current pattern after recording. Quantization is covered in-depth in this video.
- Edit Step: Set how many lines the cursor will skip down in the Pattern Editor when entering a note or effect.
- Vol/Pan/Dly/FX: Toggle the volume, panning, delay and Local FX sub-columns for the currently selected track.
- FX Drop-down Menu: Quickly show and insert Effect Commands.
